The finished wallpaper project in your home looks beautiful and everyone loves it, but later you notice some loose spots. Your wallpaper has bubbles. If you’ve just hung the wallpaper and the glue is still moist, you may be able to lift it off the wall and smooth out the bubble as you reapply it, or, if the wallpaper is peel and stick, you can usually just reposition the panel and remove the bubble. If the wallpaper has been up for a while, you will need to repair it.
Why Is My Wallpaper Bubbling?
Bubbling is a common problem for beginners and professional installers alike. A usual reason that wallpaper develops air pockets or bubbles is:
- If the bubble is still wet, it’s a good indication too much paste was applied. Inversely, if the bubble is dry, not enough paste was applied.
- The wallpaper paste wasn’t properly smoothed out.
- Unprimed drywall patching material came loose or bubbled as the glue dried.
- The wall was not properly prepared prior to installation or was primed with an incompatible primer.
Often, bubbles will dissipate over time as the adhesive dries and puls the wallpaper tight to the wall. Wait a day or two after hanging to see if the bubbles disappear before jumping to a fix. If the bubbles remain, the good news is that there is a simple solution to remedy this problem and it can usually be done in less than 10 minutes.
6 Easy Steps To Remove Wallpaper Air Bubbles
As with any repair job, there are a few tools you’ll need to get the job done properly:
- Sharp Snap-Blade Knife
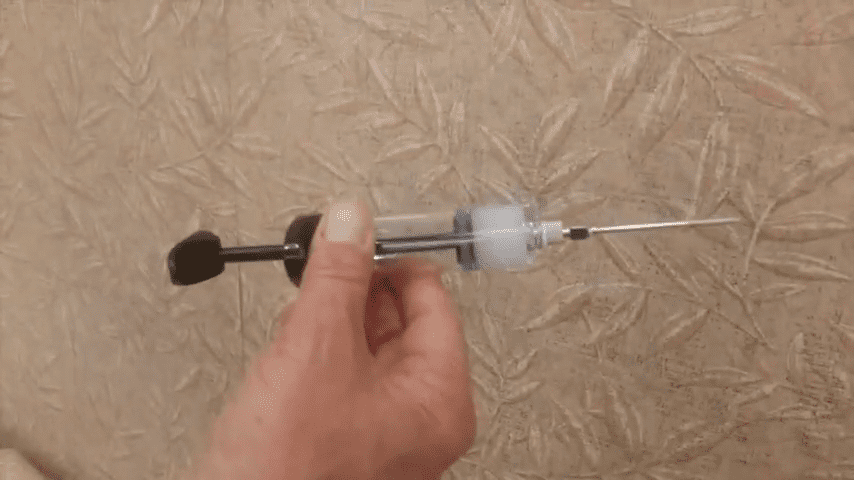
- Wallpaper Pasting Syringe — We recommend the model made by Advance Equipment
- Wallpaper smoothing tool
- Wallpaper paste
- Damp sponge
1. Locate The Bubble
Before starting, locate the areas that need repairing. Feel carefully to determine if the bubble is wet or dry. Bubbles can also be caused by loose dirt, paint, or other debris that can be removed in step 2.
2. Cut An Opening In The Bubble
Very carefully make an “X” shaped incision over the bubble with the snap-blade knife. Use a brand new blade to ensure that you don’t tear the wallpaper in the process of opening the air pocket. Try to follow the pattern of the wall paper when making the cut so that the repair will blend in, while making sure the incision opens up the entire area that has bubbled.
Once opened, check for small paint chips or other small particles that may have caused the bubble then press all the air out of the space. If the bubble was caused by too much paste, squeeze out the excess and smooth down the repair. If the repair needs additional paste, move on to step 3.
3. Fill The Glue Syringe With Wallpaper Paste
The glue syringe is probably not in your tool kit but is available online and at most hardware stores and will make the application of the wallpaper adhesive neat and easy. The recommended adhesive for this procedure is ROMAN PRO-880 Ultra Clear. It works well with most types of wallpaper, has a long working time and cleans up with water.
4. Insert The Syringe In The Bubble And Apply The Adhesive
Carefully place the glue syringe in the “X” shaped opening and apply the paste. Be sure to cover the entire area. It should all be wet, but not soaked. Do not push the syringe past the cut area as you might tear the wallpaper that is properly attached.
5. Use A Smoothing Tool To Attach The Repaired Area
Using light pressure, run the smoothing tool over the patched area in all directions, pressing out the excess paste. Make sure the flaps of the cut are lying flat and match the pattern.
6. Wipe Away Any Excess Adhesive
Using a slightly damp sponge, clean up any wallpaper adhesive when smoothing over the repair. Be certain to check that the repair is still intact after you have cleaned the surface.
ROMAN Products Are Your Best Solution For Repairs
We have been providing products and know-how to the professional wallpaper installer and the DIY-er for over 75 years. Our adhesives, primers, and removers have been developed to ensure exceptional results for new installations and repairs and our PRO-880 adhesive is the go-to product for paperhangers in the industry. Most ROMAN products can be found at your favorite big box store or ordered online.
Our website provides videos, PDFs, and application instructions as well as technical data and SDS sheets. We can be reached by phone Monday through Friday from 8 AM to 4:30 PM CT. Contact our customer service professionals today to help make your wallpaper project easy and beautiful.
Recent Posts
-

How to Stick Wood Panels to Walls Without Nails
read more >> -

Installing a Waterproof Shower Surround
read more >> -

How to Install FRP and Wall Protection Panels
read more >> -

How to Layer Wainscoting With Wallpaper
read more >> -

How to Use Wallpaper to Create a Faux Brick Effect
read more >> -

Wallpapering Inside Closets & Pantries: A Fun Surprise Element
read more >>


