
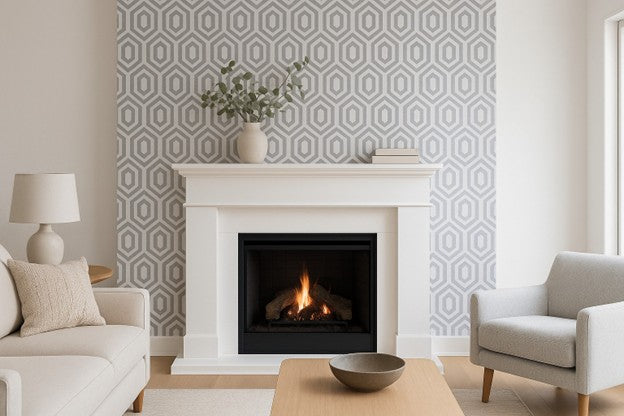
Wallpapering a ceiling sounds like a strange idea to some, but in fact this is a common home improvement option. By extending the wall designs across the ceiling, you can create a harmonious, unified looking room. Or you could use ceiling wallpaper to provide an accent to a room with plain walls. It can provide a practical function as well by covering up cracks or other flaws on the ceiling.
Applying wallpaper to a ceiling can be a tricky process, however. Even if you have experience with hanging wallpaper, you could easily run into problems if you’ve never done a ceiling job, as there are a few additional considerations you must bear in mind. Let’s explore how to wallpaper a ceiling the right way.
Preparing the Room

When wallpapering a ceiling, you need to observe many of the same practices that apply to a standard installation. Just as you should ensure that a wall is clean and smooth before you proceed with an installation, it’s best to do the same with your ceiling. That includes removing any old wallpaper that might be up there.
Be sure to clean the ceiling thoroughly and fill any holes or cracks with spackle or joint compound, as an uneven surface could prevent your wallpaper from adhering properly. The need for a smooth surface is why popcorn ceilings are considered unsuitable for wallpaper.
If you’re going to paint your ceiling, you should wait a month or so before proceeding with your wallpaper installation. That’s because new paint, even if apparently dry, can take weeks to properly cure.
Also, in the event that you’re wallpapering a new, unfurnished room, it’s generally advisable to do the ceiling first. This will prevent you from harming the material on the walls during your ceiling installation.
Gathering Your Tools

You should obtain all the required accessories prior to commencing your installation. You will need a good primer for your ceiling—ROMAN’s PRO-999 Rx-35 works well for most porous surfaces. If you’re using paste, you’ll also need the right wallpaper adhesive.
Other useful accessories you should have on hand include:
- Carpenter’s level
- Tape measure
- Pencil
- Step ladder(s) (can be used w/ scaffolding boards, if you prefer)
- Utility knife
- Roller and/or paste brush
- Seam roller
- Smoothing tool
- Sponge & bucket
Now you’re ready for the next step.
Hanging the Wallpaper
Before you begin, you should turn off the electricity to the room and remove or cover furniture to avoid harming it with water or chemicals. And if possible, try to get at least one person to help you with the installation. Hanging wallpaper on a ceiling can be tough for a solo installer, and it’s best to have assistance in handling the materials.
Apply primer

Apply the primer in accordance with manufacturer directions. You may need a small brush to cover the corners and edges of the ceiling properly. The primer needs to dry completely before you proceed to the next step; that can take anywhere from three to over twenty-four hours, depending on the primer you use. As always, refer to the directions for specific guidance.
Create a line
You need to draw a straight line across the middle of the ceiling to guide the placement of the first strip of wallpaper, which should be centered. A laser level or chalk line can be very helpful here.
Remember that when you’re hanging your wallpaper, it’s best to start from the wall containing the main window and work your way to the opposite side of the room. This helps prevent sunlight from casting shadows due to overlapping wallpaper strips.
One good strategy is to determine the line down the center of the room, and then draw a line parallel to it, at a distance of half the width of your wallpaper. By using this line as a guide to position the edge of your first strip, the wallpaper will be properly centered on the ceiling and aid the correct installation of the other strips. But if you have an irregularly shaped room, you should start with the area where the longest length of wallpaper will be installed.
Measure your strips

When cutting your wallpaper, remember that you need to go four inches over the length of the wall. You’ll trim the excess material once the strip has been applied to the ceiling.
What happens next depends on whether you’re using paste in some capacity or using peel-and-stick wallpaper. If used, paste should be applied in accordance to manufacturer instructions, on the ceiling or on your wallpaper backing. Either way, you should “book” your wallpaper so that it is gently folded and you can grasp it with one hand.
Begin hanging the wallpaper
Holding the wallpaper in your non-dominant hand, climb the step ladder so you can access the area of the ceiling nearest the window. Release one fold of wallpaper, then carefully apply it to the ceiling. Run the smoothing tool over it to ensure a flat surface.
You can repeat this process until you have reached the opposite end of the room. Once you’ve installed the entire strip, use your utility knife to trim off the excess and create a flush look.
Tips to bear in mind:
- If you’re using peel-and-stick wallpaper, you should peel off one section of wallpaper at a time during installation, rather than removing the whole backing all at once. Additionally, E-Z Hang Peel and Stick Helper can make moving peel-and-stick wallpaper into position a bit easier.
- During installation, keep holding the booked wallpaper close to the ceiling to avoid pulling off the installed portion. This is where it helps to have another person who can aid you in managing the wallpaper. Alternatively, you can use a pole to hold the booked wallpaper in place while you reposition your step ladder.
- What if you encounter a fixture on the ceiling? You can use your knife (or scissors) to cut radial lines in the wallpaper to create a temporary opening that will accommodate the fixture. After you have installed the strip, you can carefully reshape the opening with your knife to make it look pleasing to the eye.
After you’re done wallpapering your ceiling, you should wipe off any excess paste on the surface.
One of the keys to a successful wallpaper installation is using quality products and accessories. You can find what you need at ROMAN Products, an industry leader since 1957. Feel free to explore our extensive product catalog, featuring a wide array of wallcovering adhesives, primers, removers, and more.
Recent Posts
-

How to Layer Wainscoting With Wallpaper
read more >> -

How to Use Wallpaper to Create a Faux Brick Effect
read more >> -

Wallpapering Inside Closets & Pantries: A Fun Surprise Element
read more >> -
How to Install Wallpaper on a Fireplace Surround for a Bold Touch
read more >> -

How to Wallpaper a Kitchen Backsplash (and Waterproof It)
read more >> -
How to Remove Stains From Wallpaper Without Ruining It
read more >>


