


Removing old wallpaper can uncover a few surprises. Instead of a smooth surface ready for paint, you might discover stubborn glue or torn drywall paper hidden beneath the wallcovering.
What happens next depends on the condition of your walls. Some surfaces need little more than cleaning and priming, while others require extensive repairs.
Stripping removes the old wallcovering, skim coating smooths damaged surfaces, and priming prepares the wall for its next finish. These aren't necessarily competing options, and your project may require more than one.
Here's how to assess your walls and choose the right approach.
Choosing the Right Wallpaper Removal Method
The method you use to remove wallpaper can influence how much repair work you'll face afterward. Aggressive scraping and excessive moisture can damage drywall, especially when the original wallpaper was installed without proper priming.
Removing Strippable Wallpaper Without Soaking
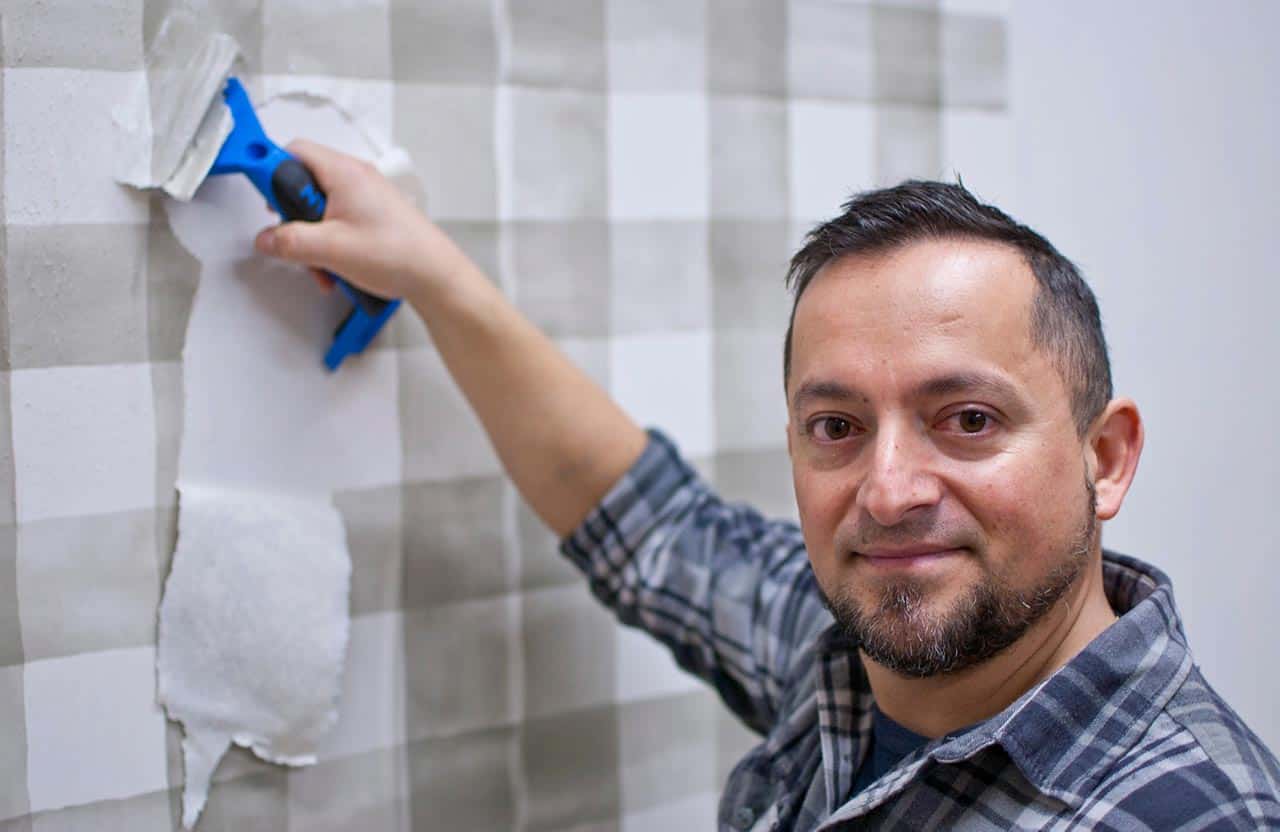
Some modern nonwoven and fabric-backed wallpapers can be removed without soaking. Gently lift a corner with a putty knife and pull the material slowly, keeping it close to the wall.
Dry stripping works best with wallcoverings designed to release easily, particularly when the surface was properly primed before installation.
Soaking, Scoring, and Scraping Stubborn Wallpaper
Older wallpaper and moisture-resistant vinyl may require a different approach.
A wallpaper scoring tool creates small perforations that allow removal solution to reach the adhesive. Use gentle pressure to avoid gouging the drywall. Some vinyl wallcoverings have a peelable facing that can be removed before treating the backing.
Apply a wallpaper removal solution according to the manufacturer's instructions and allow time for the adhesive to soften before scraping. Once the adhesive has softened, gently peel or scrape away the wallpaper, reapplying remover to stubborn areas rather than forcing the material off.
Once the wallpaper is removed, clean away any remaining adhesive with an appropriate remover and sponge. Rinse with clean water and allow the wall to dry thoroughly.
ROMAN PRO-458 Gel Wallpaper Paste Remover clings to vertical surfaces, while PRO-466 Concentrate Wallpaper Paste Remover is suited to larger projects.
A steamer for wallpaper removal offers another option for stubborn material, but excessive heat or moisture can damage vulnerable surfaces.
Wallpaper Removal Methods at a Glance
HomeGuide estimates professional wallpaper removal at $0.80-$3.00 square foot, rising to $8.00 for difficult jobs.
|
Method |
Best for |
Effort |
Professional cost/sq. ft. |
|
Dry stripping |
Strippable wallpaper |
Low |
$0.80–1.00 |
|
Steaming |
Stubborn wallpaper adhesive |
Moderate |
$1.00–3.00 |
|
Soaking and scraping |
Difficult, older wallcoverings |
High |
$3.00–8.00 |
Costs are estimates for professional removal, not DIY materials.
Read Your Walls: What You Find After the Paper Comes Off
Once the wallpaper is removed, inspect the exposed surface before deciding what to do next.
-
Clean, smooth walls: If the surface is sound and undamaged, cleaning and appropriate priming may be sufficient.
-
Remaining wallpaper glue: Remove excess adhesive before repairs or priming. Residue can interfere with subsequent coatings.
-
Torn brown drywall paper: Seal exposed drywall facing paper before applying joint compound to prevent bubbling.
-
Gouges or uneven patches: Small areas may only need spot repairs. Widespread damage can justify skim coating.
When to Prime Walls After Removing Wallpaper

Priming helps create a suitable surface for paint or new wallcovering. It is particularly important after repairs, when joint compound and exposed drywall may absorb coatings unevenly.
Before priming, remove remaining adhesive and allow the wall to dry.
ROMAN PRO-999 Rx-35 Sealer/Primer is formulated for porous surfaces, including damaged drywall, joint compound, and skim coats. It can also seal prepared surfaces with residual wallpaper paste after excess adhesive has been removed.
If you're painting, use a primer compatible with the repaired wall and the selected paint. For new wallcovering, a dedicated wallpaper primer provides advantages that ordinary paint primers may not offer.
For example, ROMAN PRO-977 Ultra Prime creates a durable, matte surface that improves wallpaper positioning and promotes easier removal during future redecorating.
Learn more about priming walls before wallpapering and selecting primers for common wall surfaces.
When a Skim Coat After Wallpaper Removal Is the Right Call
A skim coat smooths widespread damage and texture differences with a thin layer of joint compound. Isolated scratches usually need only spot repairs.
Skim coating isn't a substitute for repairing loose drywall joints or popped fasteners. Those problems should be addressed before resurfacing.
Why Torn Drywall Paper Needs Sealing Before Skim Coating
Exposed drywall paper can bubble when it absorbs moisture from joint compound. Seal it with PRO-999 Rx-35 and let the sealer dry before repairs. This step is not automatically necessary before every skim-coating job.
How to Skim Coat Walls After Wallpaper Removal
Follow this basic sequence:
-
Clean the wall. Remove remaining wallpaper adhesive and loose drywall paper. Allow the surface to dry before proceeding.
-
Seal exposed drywall paper. Apply PRO-999 Rx-35 to damaged areas and let it dry according to the product instructions.
-
Repair deeper damage. Fill significant gouges with suitable joint compound before applying the skim coat.
-
Apply thin coats. Use a wide drywall knife to spread joint compound evenly. Allow each coat to dry before applying another. Two coats may be needed for an even finish.
-
Sand and prime. Lightly sand the completed surface, remove dust, and apply a compatible primer before painting or wallpapering.
Severely damaged drywall may be better replaced than skim coated.
For detailed instructions, see our guide to repairing drywall after wallpaper removal.
DIY or Hire a Pro?
Wallpaper removal is manageable for many DIY homeowners, particularly when the material strips away easily. Large projects involving difficult adhesives or extensive skim coating may justify professional help.
According to HomeAdvisor's June 2026 cost guide, professional wallpaper removal costs typically range from $423 to $1,192, with an average of $793.
Safety note: Homes built before 1978 may contain lead-based paint. Before disturbing potentially painted surfaces, consult the EPA's lead-safe renovation guidance.
Prep Today for Easier Removal Tomorrow
A quality wallcovering primer helps protect the underlying surface while supporting adhesion during installation. When it's time to redecorate, properly primed walls can allow compatible strippable wallpaper to release with less damage.
Although painting or hanging new wallpaper over an existing covering may appear convenient, ROMAN generally recommends removing the old wallpaper first. Covering it can leave the new finish dependent on aging adhesive and may create bubbling or adhesion problems.
Prepare Your Walls With ROMAN Wallpaper Removers

ROMAN wallpaper removers help soften stubborn adhesive for easier removal. Explore our collection of wallpaper removers to find the right products for your next project.
FAQs
Do I need to prime walls after removing wallpaper?
Yes, priming is generally recommended before painting or installing new wallpaper. A compatible primer helps seal porous surfaces and provides a more uniform base for the new finish. Complete any necessary cleaning and repairs before applying it.
Is it better to skim coat or just prime walls after removing wallpaper?
It depends on the wall's condition. Priming may be enough for smooth, undamaged surfaces, while widespread imperfections may require skim coating first. Primer cannot hide significant gouges or uneven texture.
Can you paint directly over wallpaper glue residue?
Painting directly over wallpaper glue residue is not recommended. Remaining adhesive can interfere with paint adhesion or reactivate when exposed to moisture. Remove as much adhesive as possible, allow the wall to dry, and use an appropriate primer before painting.
Recent Posts
-
Wallpaper Removal: Strip, Skim Coat, or Prime?
read more >> -

Choosing the Best Spray Adhesive
read more >> -

How to Stick Wood Panels to Walls Without Nails
read more >> -
Installing a Waterproof Shower Surround
read more >> -

How to Install FRP and Wall Protection Panels
read more >> -
How to Layer Wainscoting With Wallpaper
read more >>


