Wallpaper installation is an activity that anyone can learn. In fact, many homeowners enjoy the process of hanging their own vinyl wallcoverings, as a way of giving the premises that personal touch. At ROMAN Products, we’re proud to manufacture the kinds of high-quality adhesives, primers, and removers that can be used safely and effectively by experienced pros and DIY amateurs alike.
But although hanging wallpaper can certainly be a rewarding experience, you definitely need to know what you’re doing if you expect to avoid installation issues. One of the more common problems that DIY installers encounter is excess paste appearing along seams.
This happens when paste on the walls or on the back of the wallpaper is squeezed out during the application process. It’s most likely to occur when too much paste has been applied prior to installation. It ends up gathering on the edges of the paper, creating a shiny or milky blemish, which tends to be particularly noticeable on dark-colored wallcoverings.
No matter what kind of wallpaper you’re working with, you need to know how to remove wallpaper paste. If you plan on hanging new wallpaper in your home, it’s best to figure out in advance how to deal with any excess paste, so you can safely address the issue before the adhesive dries. Getting rid of still-fresh paste is much easier than trying to remove dried wallpaper paste that has become hardened.
So how do you go about clearing away that troublesome paste on your vinyl wallpaper? Here’s an overview of the procedure.
Getting Ready

To begin, you need to ensure that the area is properly illuminated during the wallpaper installation process. Poor lighting tends to hide excess paste, especially if the adhesive hasn’t dried yet. Remember, you want to remove wallpaper glue along the seams as soon as possible, before it becomes dry and firm.
You also need to gather your tools. Your arsenal for this task should include the following:
- 3 buckets of clean, warm water
- 3 clean sponges (the Piranha Wallpaper and Paste Removal Sponge from ROMAN is ideal for this purpose)
- 3 clean towels (absorbent towels preferred)
It’s a good idea to have some paper towels on hand as well. Common commercial towels are enough for your purposes here. In addition, gloves are useful for keeping paste off your hands.
Cleaning the Wall
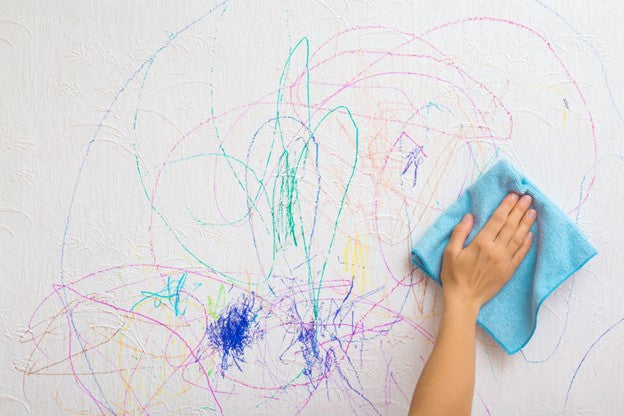
One of the benefits of vinyl wallcoverings is that they can be cleaned with plain old water. No special chemicals are required; in fact, these can harm the wallpaper, so be sure to use only water.
Nonetheless, the best procedure is to test the wallpaper prior to using your cleaning accessories on it. You can do this by selecting a small, out-of-the-way portion of the wall and cleaning it with the type of sponge and water you plan to use on the residual paste. This allows you to observe any adverse reactions to the wallpaper—if something goes wrong, it will affect only a relatively inconspicuous area.
Once you’re confident in the safety of your tools, you can proceed with getting rid of that residual paste. You will be using what is called the “three-bucket cleaning method.” Although it can vary in details, the basic idea of this method is always the same: set up several distinct work stations in order to avoid contaminating the cleaning surface with recycled, dirty water and accessories. That’s why you were asked to gather three sets of tools to work with.
Taking off excess paste goes like this:
- Remove as much excess paste as you can with a paper towel or a lint-free cloth. Use a dabbing motion; don't try to wipe or rub it off.
- Use one of your sponges to apply warm water to the area where excess paste has accumulated. You should do this with a vertical top-to-down motion; also, be careful on the wallpaper seams, as applying too much pressure or too much water can interfere with adhesion.
- Use a dabbing motion with the sponge to remove the remaining paste, or as much of it as possible.
- Use one of your towels to dry the spot.
- When the surface is completely dry, perform steps #2 through #4 two more times, each with a new set of water and cleaning tools.
By using fresh water and sponges for each cleaning cycle, you will avoid tainting your wall with unclean materials.
Preventing Excess Paste

Of course, the best way to deal with excess paste on your wallpaper is to keep it from winding up there in the first place. If you have repeated problems with paste being pushed over your wallpaper seams, you’re probably using too much adhesive. When applying paste, use a thin brush on the edges of the wallpaper (or the spot on the wall where the edges will rest) to ensure more careful application or remove excess paste that has been accidentally applied.
In addition, you should always make sure you're using the right adhesive for installing vinyl wallcoverings, such as ROMAN's PRO-838 Heavy Duty Clear.
How to Remove Dried Wallpaper Paste from Solid Vinyl Wallcovering
In cases where the paste has already or mostly dried, the removal procedure is trickier, but it’s still possible to get rid of that excess adhesive. One particularly useful tool for this task is the PRO-466 Concentrate from ROMAN Products. This high-quality wallpaper paste remover is excellent for taking off residue on vinyl wallcoverings.
For best results, follow this procedure when cleaning solid vinyl wallpaper:
- Test your cleaning materials on a small 24” x 24” area of the wallpaper to ensure no adverse reactions.
- Mix 10.5 ounces of PRO-466 into one gallon of hot water.
- Use a spray, bottle, or towel to apply the PRO-466 solution to the wall. Start at the top of the wall and systematically work your way down. Try to ensure the surface is evenly wet.
- Let the solution sit for five minutes before attempting to remove the adhesive. If you have a textured or embossed vinyl wallcovering, it is recommended that you use a non-scratching and non-abrasive bristle brush (nylon, polystyrene, or polyester) to remove the adhesive on the wallcovering.
- If necessary, reapply the PRO-466 solution and clean the wallcovering again, using new tools to avoid dirtying the surface. Be sure not to allow the surface to completely dry at any point during the cleaning process.
For the best wallcovering adhesives, primers, and removers on the market today, you can always rely on ROMAN Products. Feel free to contact us with any questions you might have about our inventory.
Recent Posts
-

How to Layer Wainscoting With Wallpaper
read more >> -

How to Use Wallpaper to Create a Faux Brick Effect
read more >> -

Wallpapering Inside Closets & Pantries: A Fun Surprise Element
read more >> -
How to Install Wallpaper on a Fireplace Surround for a Bold Touch
read more >> -

How to Wallpaper a Kitchen Backsplash (and Waterproof It)
read more >> -
How to Remove Stains From Wallpaper Without Ruining It
read more >>


