It’s time for a change on the walls of your home. The old wallpaper has been up for what seems like ages, and it has to come down—now. You’ve heard nightmare stories about people that have tried to remove old wallpaper and ended up with a mess. However, the task does not have to be difficult or complicated. The first step is to be aware that you will probably have some damage to your drywall and repairing walls after wallpaper removal is inevitable to some degree.
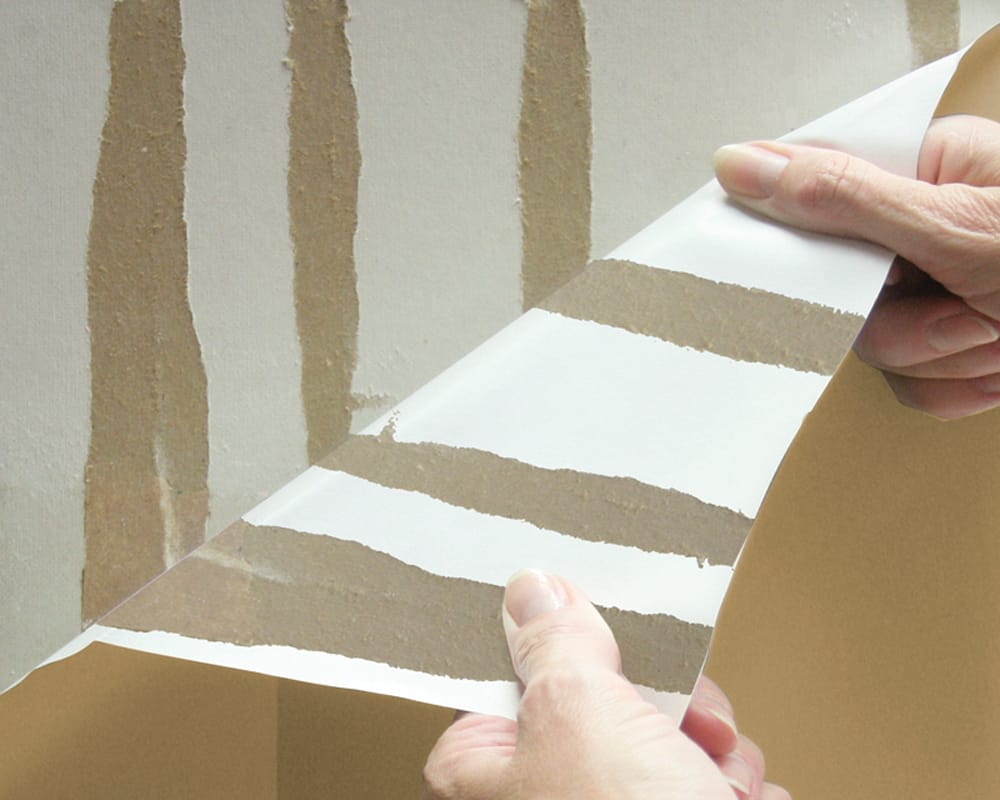
Regardless of how careful you are when removing old wallpaper, it may be difficult to strip the paper without damaging the drywall. Removing it will require the use of a professional remover solution (such as PIRANHA Ready-to-Use Gel Wallpaper Remover) and in some instances, a lot of elbow grease.
To ensure a smooth removal process, it's beneficial to understand the type of wallpaper and adhesive used in your home. Modern adhesive removers are designed to effectively penetrate and dissolve the glue, allowing for easier and cleaner wallpaper removal. By applying the remover solution as directed and allowing sufficient time for it to work, you can minimize the risk of damaging the underlying drywall.
The good news is that, in most cases, repairing drywall after wallpaper removal doesn’t mean you have to call a professional contractor. Drywall repairs can be handled with a few tools, drywall joint compound, and a good bit of patience. After the repairs have been completed, you can prime the walls in preparation for painting or installing new wallpaper with an application of ROMAN PRO-999 Rx-35 Sealer/Primer.
Repairing drywall after wallpaper removal can be broken down into easy-to-follow steps:
- Preparation - Gather necessary tools and materials like a utility knife, sandpaper,cloths, dropcloth/tarps, joint compound, taping knife, and safety gear.
- Initial Repairs - Address minor damage by removing loose paper, sanding, cleaning, and applying ROMAN PRO-999 Rx-35 Sealer/Primer.
- Skim Coating - Apply joint compound to damaged areas, allow to dry, sand smooth, and clean.
- Priming - Apply a final coat of ROMAN PRO-999 Rx-35 Sealer/Primer to prepare for new wallcoverings or paint.
In the below sections, we’ll go into more detail on how to handle small drywall repairs vs. repairing a whole wall, but first you’ll want to verify you have all the necessary supplies.
Tools & Material List
Here’s a basic list of the tools and materials you will need to complete the job:
- A utility knife
- Medium and fine-grit sandpaper
- Cloths for cleaning up
- Dropcloth or tarps to protect the floors and furniture from the dust (Depending upon the size of the area you are repairing, there could be a lot of drywall dust.)
- Joint compound
- Taping knife (For small jobs, a 6” knife will work. For larger areas, you may need to get a 10” or 12” taping knife to achieve a smoother look and cut down on your sanding time.)
- Dust mask and eye protection
This is a basic list and you may find there are some additional items required.
Small Drywall Repairs
First, we’ll cover how to repair torn drywall on a small scale. Remove any loose brown paper from the surface of the drywall. If there are no gouges, you can use fine-grit sandpaper and smooth out the edges. Remove all dust from the wall with a cloth, and then apply a coat of ROMAN PRO-999 Rx-35 Primer/Sealer to the area with a roller or brush. The primer will seal the exposed surface and ensure the skim coat adheres properly and that the drywall paper doesn’t bubble.
Allow the primer to completely dry. PRO-999 Rx-35 typically dries in 3-4 hours, although allowing it to dry overnight is ideal.
Once the primer has completely dried, you’re ready to apply a skim coat of joint compound to the damaged area. For small repairs to drywall after removing wallpaper, you may only need one coat of compound. Large areas may take several passes. Make sure to allow each layer of joint compound to fully dry before proceeding. Once the repair is completely dry, lightly sand and wipe the area clean with a cloth.
Prime the repaired section with another coat of ROMAN PRO-999 Rx-35 Primer/Sealer before installing new wallcoverings or painting the walls.
It's also helpful to use a light to angle across the surface of the repairs before the final priming. This technique can reveal any imperfections or areas that may need additional smoothing. Taking the time for these final checks can ensure a professional-looking finish that seamlessly blends with the rest of your wall.
Whole Wall Drywall Repairs
The process of repairing drywall after wallpaper removal on a large area is basically the same as a small repair—you will just use more joint compound and more primer/sealer. You may only need a gallon of joint compound to repair a small area, but you will probably need a larger container of mud to skim coat a wall with extensive drywall damage.
Start by removing all loose drywall paper and any wallpaper still adhering to the surface with a 6” drywall knife, and if needed, apply PIRANHA Gel Wallpaper Remover to the areas that are hard to clean. Next, use fine-grit sandpaper to smooth out the affected surface of the wall. You may find that a pole sander allows for faster sanding than trying to do it all by hand. Wipe down the entire wall to remove any dust that remains.
Seal the wall with ROMAN PRO-999 Rx-35 Primer/Sealer and allow to dry before applying the skim coat. This usually takes 3-4 hours.
For skim coating large areas, you will find that using a 12” drywall knife allows you to cover a larger surface area and will make the final sanding job a lot easier. For easier application of the drywall mud, use the 6” knife to remove the mud from the 5-gallon bucket and apply it to the 12” knife or to the wall, whichever is easier.
Once the skim coat completely dries, use the fine-grit sandpaper to smooth out the area. If you need another skim coat, remove all the dust from the wall before applying it. If one coat will suffice, clean the entire wall with a cloth and apply another coat of ROMAN PRO-999 primer/sealer to the area that has been skim coated.
ROMAN’s PRO-999 Rx-35 Primer/Sealer Is The Top Choice For Professional Installers
PRO-999 is ideal for sealing porous surfaces, like sheetrock, prior to painting or hanging wallpaper. PRO-999 has been formulated specifically to seal surfaces such as:
- Damaged sheetrock
- Joint compound
- Residual wallpaper paste
- Builder’s flat paint
Once the wall has been properly sealed, you can easily paint or install new wallcoverings. ROMAN Products carries a complete line of primers, pastes, and removers that professionals, and the DIY community as well, find easy to use and deliver consistently professional results. Contact us today for more information on our complete line of products as well as helpful videos, tips, and ideas.
Recent Posts
-

How to Stick Wood Panels to Walls Without Nails
read more >> -

Installing a Waterproof Shower Surround
read more >> -

How to Install FRP and Wall Protection Panels
read more >> -

How to Layer Wainscoting With Wallpaper
read more >> -

How to Use Wallpaper to Create a Faux Brick Effect
read more >> -

Wallpapering Inside Closets & Pantries: A Fun Surprise Element
read more >>


