You can’t stand to look at that old wallpaper for another minute. It was trendy 20-30 years ago, but now it’s just outdated. You need a fresh start on those walls and you’ve made the decision to take the old paper down. With a little patience, removing wallpaper can be a straightforward and easy job. To learn how to remove wallpaper in 6 simple steps, and the secret to making the new installation even easier, check out the following application recommendations.

Tools/Materials You Will Need
- ROMAN Scoring Tool
- ROMAN Wallpaper Scraper
- ROMAN Removal Sponge
- ROMAN Wallpaper and Paste Remover
PRO-458 Gel Wallpaper Paste Remover
OR
HOW TO REMOVE WALLPAPER IN 6 SIMPLE STEPS
1. Test a small area
Find a small area, about 2’ x 2’, preferably with a seam in it. You are going to perform the same steps on the test area that you will use to complete the entire job. Take a large putty knife and locate the seam. Use the putty knife to loosen the seam from the wall to see how well the wallpaper is attached and how many layers you will be removing. Make a note if the wall you are working on is plaster or drywall.
IMPORTANT NOTE:
If your home is more than 50 years old, you likely have plaster walls. These are thicker and more durable than drywall, and therefore harder to damage while removing wallpaper. If the home is less than 50 years old, there’s a good chance your substrate is drywall. Removing wallpaper from drywall can be a little tricky because you need to be careful not to damage the surface with the scraper or scoring tool as it will create more work for yourself when you get ready to prep the walls for new paper.
Next, take your wallpaper scoring tool and with a circular motion go over the test area with even pressure to lightly puncture the face of the paper. Don’t press too hard. You are just making light perforations to allow the remover easy access through the wallpaper onto the wall to make sure it is saturated.
Apply your wallpaper remover to the entire test area. Make sure all the wallpaper is wet.
Wait 15 minutes before you attempt to peel off the paper. Trying to get a head start at this point will cause you more work down the road. Let the remover solution do its job by sitting on the paper for a full 15 minutes.
Now, try removing the old wallpaper on the test area. If the wallpaper peels right off you are ready to start your project.
2. Protect Furniture, Floors and Electrical Outlets
Use our how to remove wallpaper checklist when getting the room ready:
- Move all your furniture to the center of the room, or to another room so that there is no chance of getting remover or old wallpaper on it.
- Remove items from the walls so that you have a clear surface to work on.
- Protect your floors by laying down painter’s tarps on the floors throughout the room.
- Disconnect power from the area you are working in at the electrical panel.
- Remove electrical outlet covers.
- Turn off any fans in the room.
- You should also consider closing AC/heating vents in the room to reduce the flow of air. Remember, moving air will dry out the remover faster — and that is not a good thing!

3. Score the wallpaper
Regardless of the type of wallpaper you are removing, a scoring tool will make the task much easier. It creates tiny holes in the wallpaper that allows the remover solution to penetrate the wallpaper. Simply rub it over the area you are working on in a circular motion while applying even pressure.

It is recommended that you work in an area no wider than 4’. This will help ensure that the remover solution does not dry out before you can scrape the wallpaper and old paste off.
4. Spray Removal Solution on the Wallpaper
Apply your ROMAN wallpaper paste solution to the wall, being careful to follow the manufacturer directions as you do.
Keep the walls saturated with remover to ensure the paste doesn’t dry out. With the room prepped, you’re ready to apply the wallpaper removal spray to the walls. Be sure to wear eye protection.

Have a large garbage can ready for a convenient place to place large pieces of wallpaper waste/debris directly into. This will save you cleanup time later. The small pieces that hit the floor will be caught by your painter’s tarp.

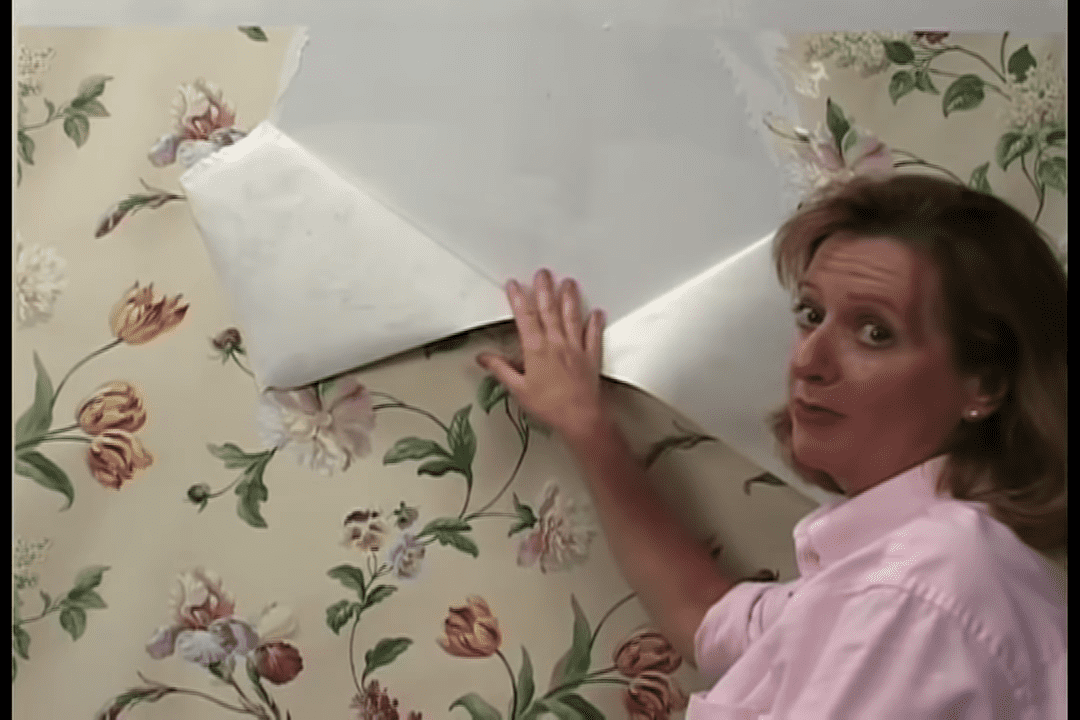
5. Scrape
Once the remover solution has had time to break down the wallpaper paste, begin scraping the walls clean. The wallpaper seam is an ideal starting place. If the wallpaper still adheres well, apply some additional removal solution to the wall.

You may notice that some old paste is still adhering after the old paper has been removed. Just apply some more ROMAN wallpaper remover to these areas, wait 15 minutes, then scrape the excess paste off.
6. Clean Up
After the wallpaper and old paste has been completely removed, be sure to sponge down the walls with removal solution. This will help remove any residual wallpaper paste.
Prep walls for installing new wallpaper or paint — Primer
This is the secret that will make a new installation or paint project so much easier. After you have removed the old wallpaper, sponge-cleaned the entire area, and repaired any damage, apply a fresh coat of Roman PRO-999 Sealer/Primer to ensure that your next project will be a success.
ROMAN Wallpaper and Paste Removers are currently sold at The Home Depot and Lowe's shops nationwide. Check your local stores for availability.

Why You Should Choose ROMAN Wallpaper and Paste Removers
When it’s time for removing wallpaper in the bathroom, the living room, or another area, many homeowners decide to use DIY removal solutions such as water or fabric softener. But although it’s tempting to use common household materials that are already lying around the premises, the best way to remove wallpaper is to use specially formulated products that are actually designed for this purpose.
Why? Homemade wallpaper removal solutions often fail to get the job done correctly. For instance, water needs a relatively long time to take effect when applied to wallpaper, and in some cases may not be able to remove the paper at all, especially if the wallcovering is old or attached with strong adhesive.
Another popular option is fabric softener, but this product also has its shortcomings as a wallpaper stripper solution. Fabric softener frequently leaves behind hard-to-remove stains or residue on the walls. And like water, it has trouble with certain types of wallpaper.
Vinegar has shortcomings similar to those of water and fabric softener when it comes to removing wallpaper. In addition, some people have difficulty tolerating the odor of vinegar.
You can avoid these kinds of complications by using wallpaper removal solutions from ROMAN Products. We have two highly effective wallpaper paste removers: PRO-458 and PRO-466.
PRO-458 is a no-drip gel formula that comes in an easy-to-use spray bottle, while PRO-466 is a contractor-strength solution that is primarily intended for professional wallpaper installers who need to strip off large quantities of wallcoverings. Both products, carefully formulated for a wide range of wallpaper removal jobs, are available through certain home-improvement retail shops.

Removing Grasscloth Wallcovering

Removing Vinyl Wallpaper

Remove Fabric Backed Wallpaper

How to Remove Wallpaper

Easy Up, Easy Down – Non-Woven Wallpaper
Removing Different Types of Wallcoverings
However, different types of wallcoverings may require different removal methods. Here are some common types of wallcoverings and how to remove them:
Removing Non-Woven Wallpaper:
With non-woven wallpaper, you generally don’t need to score the wallpaper. If the wall was primed before the wallpaper was installed, then you may be able to peel the wallpaper off by hand in strips. Remember to pull slowly, gently, and close to the wall. However, if the wall wasn’t primed, then you will need to apply the remover and allow it to break up the adhesive before trying again. For very difficult to remove wallpaper, you may need a scraper tool as well to remove the wallpaper.
Removing Fabric-Backed Wallpaper:
Fabric-backed wallpaper also tends to be strippable and easy to remove, especially if the wall was primed before installation. Take the same steps as you would with non-woven wallpaper to remove fabric-backed wallcoverings. However, fabric-backed wallpaper may require a little more elbow grease and remover compared to non-woven papers.
Removing Vinyl Wallpaper:
Vinyl wallcoverings almost always require scoring to remove, as vinyl can prevent the remover from penetrating the backing where the adhesive is. Make sure to score evenly and densely on the wallcovering. Then, spray on the ROMAN remover of your choice, saturating the area evenly. It’s best to work from top to bottom and in sections a few feet wide so you can keep the area saturated and prevent the remover from drying out. After waiting for the remover to do its job, try peeling the wallpaper off with your hands. If it doesn’t remove easily, then use your scraper tool.
In some cases, the top layer may remove easily, but it leaves behind a second layer of paper. If you run into this problem, simply spray the left-over paper with remover, wait 15 minutes for it to soak in, and then peel or scrape it away.
Removing Grasscloth Wallcovering:
When removing grasscloth wallcoverings, you will generally need wallpaper remover to break up the adhesion between the wall and the grasscloth. Apply ROMAN wallpaper remover and wait 15 minutes for the remover to work, re-spraying when needed to prevent the paste from drying out. Then, peel or scrape the wallcovering to remove it.
Luckily, ROMAN wallpaper removers help do most of the removal job for you by breaking the adhesion between the wall and the wallcovering. Using specialized formulations designed with wallpaper adhesive in mind, our removers require only 15 minutes to make wallpaper removal quick and easy for homeowners and contractors alike. Save time and hassle by using ROMAN wallcovering removers for your project.
Recent Posts
-

How to Stick Wood Panels to Walls Without Nails
read more >> -

Installing a Waterproof Shower Surround
read more >> -

How to Install FRP and Wall Protection Panels
read more >> -

How to Layer Wainscoting With Wallpaper
read more >> -

How to Use Wallpaper to Create a Faux Brick Effect
read more >> -

Wallpapering Inside Closets & Pantries: A Fun Surprise Element
read more >>


